


Tutorial - Box with 4 drawers...
This is my DT-project for Unik Hobby last month, and I'll show you how to make it. :) This box is larger than the other one I've made, but the procedure it the same.
I warn you - this is a long post... ;)

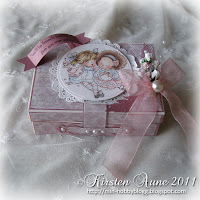
I've colored the image with Promarkers. I've only tried this once, but hopefully practice makes perfect. *LOL*. I love this cute image of Sarah Kay.


On top of the box I've mounted a card (I got this idea from my good friend Lena Katrine), and it looks like this inside... To the right, I'm going to write a personal greeting to a good friend. I've decorated the insides with stamps from Stempelglede.


You need 4 pieces of cardstock, 6x6 inches.
You are going to paste these on both sides of the cardboards above.
You are going to paste these on both sides of the cardboards above.

Now we're going to make the drawers. I've used my Scor-Pal. It's so easy!!
This cardstock is 4 15/16 (length) x 4 2/16 (width) inches
Scor at 15/16 - 4 (length) and 15/16 - 3 3/16 (width).

Cut as shown below.

Add glue as shown below.

Fold the 4 corners, and your firs drawer is nearly finished...

I've mounted Tim Holtz Hitch Fasteners on each drawer.

This panel is 7 5/8 x 3 2/16 inches.
Scor at 1 - 3 2/8 - 4 5/16 - 6 5/8.

Fold and glue as shown below.

You need 4 of these.

We will now assemble the drawers on the bottom of the box.


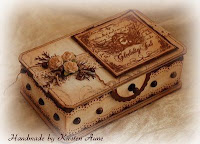
The box is almost done! :)

Make a card for the top if you want to.
I've used brown Bazill and this beautiful patterned paper from KaiserCraft.
Remember to attach the ribbon before you paste the card on top of the box..


Papers: Cardboards, Bazill - green and brown, KaiserCraft - Duchess Empire, Promarkers - Cartridge Pads.
Stamps: Sarah Kay - Puppy Love, Stempelglede - Grunge Flourish and Min Venn, Norsk Stempelblad/Ett Trykk - Hjørnestempler.
Ink: Adirondack - Pitch Black, Promarkers.
Tools: Scor-Pal, Spellbinders - Nesing Labels 1 and Shapes Frame Classic.
Embellishments: Flowers, Leaves, TimHoltz Hitch Fasteners.
I hope you'll be able to make a box like this, using this Tutorial. If you do, please let me know so I can admire your work! :)
Have a wonderful weekend, everyone! Take care! :)
Hugs, Kirsten Read more...


.JPG)


